Hey everyone,
As most of you know I’m Ben and I’ve finished the fight on Heroic and have finished a few on Legendary in Co-op.
Obviously not as great as some people, but still.
I dare say a few people will be thinking, “Heroic??? Wimp!!!”
Others may be thinking, “Crap! I struggle with Easy!”
Anyhow.
If you can’t play the game on Easy then you cannot find any of the skulls.
UNLESS, you have a buddy that you can play the game with.
The skulls will be listed below by their location throughout the game.
Here I’m going to tell you where the campaign skulls are, where the terminals are, a few tips, and a few tricks.
SKULLS:
Skulls unlock new armor, and make the game tricker, and more fun for the player.
If you find all the skulls you unlock the Haybusa armor, which looks pretty sweet,.
To find these skulls you must be on either Normal, Heroic or Legendary. If you are on Easy you CANNOT find these skulls, they do not appear in Easy.
You MUST also start from the beginning of the level you CANNOT start from a Rally Point Alpha, Bravo etc.
Sierra 117- Blind
This first skull is at the start of level where the Phantoms bring in Covenant forces onto that small river bank.
First clear the area of all the enemies then head to the right end of the cliff, there will be a rock sticking out over the water, at the end of the rock is the skull, pick it up using the RB button.
Now it may seem like it does nothing, No achievement will be unlocked, this is normal.
Then to drop the skull press Y. You DON’T need to take the skull to the end of the level, once you’ve picked it up you’ve got it. If you want you can even save and quit. You’ll still have unlocked the skull.
Sierra 117- Iron
In the area where you rescue Johnston, head along the bridge where all the Grunts and Brutes are, at the end of this bridge hop up on a block, then on a brown pipe then up onto the platform that goes around the giant glass house. Follow this platform and hiding at the very end is the skull.
Crow’s Nest- Black Eye
At the start of this level when you don’t have a weapon yet head up the steps so that you are standing on the level with the locked door, turn around and their should be a green cage/weapon rack. Jump on it then turn right and jump up on the red metal bar, then up onto the grey concrete pipe. Walk along the pipe right to the end and there will be the Iron skull pick it up using the RB button. You DON’T need to take the skull to the end of the level, once you’ve picked it up you’ve got it. If you want you can even save and quit . You’ll still have unlocked the skull.
Crow’s Nest- Grunt’s Birthday Party
For this skull I recommend grabbing a grav lift from the room with the Grav Hammer Brute and using it here in case you struggle.
The skull is in the weird black tubed place where the drones are flying across the room from one hole to another. Now the skull is underneath you, it is underneath the metal floor you are standing on, head to the end of the room where you are about to drop down to meet the arbiter. (unless you are playing on co-op he’ll be there) There are two ways to get this skull.
The first way is to keep to the wall as you drop down the hole at the end of the room,
The second way is to jump down the hole, find where the opening is above you then use the grav lift to get up there.
It’s your choice which one you choose to do.
Once in the opening the skull will be at the end of the passage.
Tsavo Highway- Tough Luck
When you get to the broken road where you have to leave your Warthog behind head back to the big pipe on the side of the road.
Jump up on the pipe and follow it along till you get to a yellow fence in your way, jump over this fence then jump down onto the platform below on your left. You may die a few times, try landing in different spots on the platform, you’ll get it.
Once on the platform head along it and to your left there is a big rock with the skull sitting on it, jump across to the skull and pick it up, there you go, Tough Luck.
Now unfortunately, you can’t get back up after getting this skull, so you must jump off the edge, don’t worry you won’t lose the skull, but you may lose your dignity.
The Storm- Catch
After beating all the Covenant forces in the building with the Warthog you drive out into an area with an Anti-Air Wraithand heaps of Ghosts.
There is a round building at the end near the Anti-Air Wraith that looks like a hugh water tank.
Now this can be painful to get while being attacked from behind so try to clear the area first, you need to drive the Warthog up to the water tank thing and jump on top of it, then onto the building. You may even need to get a ghost and drive it onto the Warthog to make it higher.
When driving the ghost onto the Warthog hold down A and boost, that should make it easier.
This can be a frustrating skull to get, If you can manage to highjack a Wraith you can use that to get up there too.
Floodgate- Fog
You have to be quick for this one, the skull jumps over you when you head back down into the 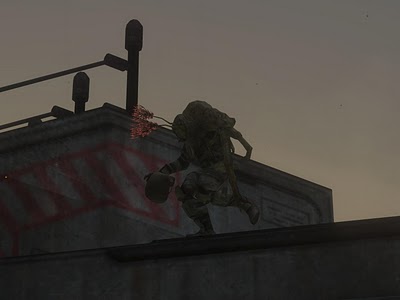 buildings . The thing that’s carrying it is a flood.
If you get your Battlerifle and zoom in to the top of the building on your right you’ll see him as you go into the city.
He’ll run accross and jump, you have to shoot him at the right moment otherwise the skull will be stuck on top of the roof. As he is in midair is a goodtime to shoot, just before he jumps is also a good time. This is another skull that can be frustrating get.
Keep at it though.
The Ark- Famine
This is without a doubt the most annoying skulls that I had to claim, it took me countless attempts. After you’ve been in the area with the big door and the sentals and had the Pelican come to the platform with Johnston saying, “Follow my Pelican cheif, I’ll show you the way,”
Follow his Pelican and beat the two Ghosts in the next area, try not to destroy the ghosts, just kill the grunts driving them.
Now see that big platform above you that looks like the one in the last area? Up there is the skull, but you need either ghosts, plasma or spike grenades, a chopper or a deployable cover to get it.
So go up onto the platform, If you drive around past where it says, “Checkpoint . . . done” there is a spot where you can jump up on a large rock then walk up the slope and jump across to the platform, you can also drive the Ghost up there using boost and hold A and boost to make the jump.
The skull is at the far left side, opposite to where you just climbed up, it is hiding in the support beam coming from the top of the platform, you should see it, it’s pretty easy to spot.
Using grenade jump you’ll have to line yourself up on an angle, throw a grenade down and jump in the air as the grenade goes off. This can take a long time to get it right so alot of jumping back to the last save will be needed.
Using Ghosts, drive the two Ghosts that you fought below up onto the platform, park one Ghost on the slope right next to the support pillar with the skull on it, then park the other Ghost carefully on top. Jump on the top Ghost and jump across to the skull, again, this may take some time. And alot of climbing back up, and falling back down.
Using a Chopper, if you can manage to get a Chopper up there it makes it easier, no stacking, just parking and jumping.
Using a deployable cover, if you place it in the right spot you can jump on it and leap across to the skull.
This is a tricky skull to get, to don’t give up!
The Ark- Cowbell
After you’ve beaten the Scarab in the hugh area go into the building near where the Scarab was, inside there is a Chopper, and a few grav lifts, grab one of these grav lifts, you’ll need it.
Now head through into the building, at one point you head down into a room full of Brutes, if you look up before turning the U turn corner you’ll see openings, in the wall above you, use the grav lift to get to the top opening, There’s the skull, enjoy. If you don’t get it on the first try just keep going back to the checkpoint by going Start-Load Last Save.
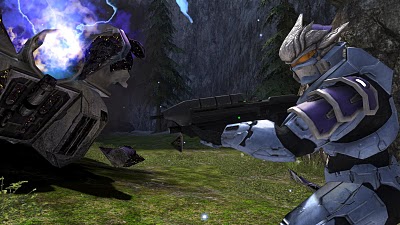
The Covenant- Thunderstorm
Once your up to the part where you drive the Hornet go to the place that the Elites previously were, it’s the building on the cliff face to your right when you take off.
Land your Hornet and go up the ramp to the top and the skull will be at the end sitting there for you. If you’re interested there is also a Terminal in the building as well. Be sure to check out the Terminals section of this post.
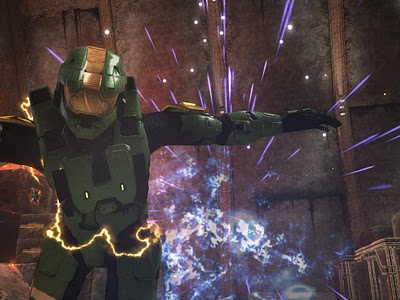
The Covenant- IWHBYD (I Would Have Been Your Daddy)
After stopping Truth from firing the rings clear the area of the Flood, it makes it a hole lot easier.
Now the big glowing rings are actually a type of combination lock.
The ring closest to Truth is number 7 and the ring at the other end near the elevator is number 1. The 1st and 2nd ring you don’t even need to use! The rings go like this:
{ELEVATOR}-O-O-|-|-O-O-O-|-|-O-O–{TRUTH}
—————-1-2—–3–4-5—–6-7————-
First thing before you go jumping, you jump onto the block then jump right through the ring, secondly you always jump through the ring facing towards the Truth.
The order of the rings that you jump through is 4654534.
Remember to jump through the ring always facing in the direction of where the Truth was, this doesn’t mean jumping backwards, this means jumping forwards through the ring.
Cortana- Tilt
Again, an annoying one to get.
In the second large room where you fight the flood, the one that has the glass floor that you can see Brutes and cloaking belowyou. Clear the room of Flood first so that it’s easier.
Head over to a small purple stand, jump on it and you should see what looks like fungi above you, jump onto it, then jump up onto another fungi, then across to another fungi platform, then along a long skin coloured tube onto the big purple platform, on the platform are human remains with the Tilt skull.
Halo- Mythic
At the beginning of the level you will walk into a big ice cave, if you follow the wall to your right you will find a small passage leading to the Mythic skull. This is the easiest skull to get.
Congratulations! That’s all of the skulls!!!
TERMINALS
These terminals are weird, there are seven of them and they are on 3 maps only, The Ark, The Covenant and Halo.
Once you find them all there is an Xbox achievement, that’s all really.
Before we begin you have to remember that when looking at the terminals you must wait until the second lot of text comes up after the console flashes red.
I’ll explain again simpler, so go to the Terminal, hold RB to read it, there will be a page or so of text, then text will turn to code and the terminal will turn red, DON’T PRESS B YET wait until a new screen of text comes up before exiting.
The Ark
-TERMINAL 1-
After beating the Hunters you go up the cliff into the building, turn left instead of continuing down the hallway and the terminal will be in that room.
-TERMINAL 2-
After activating the weird energy bridge to let the tanks and Warthogs across the gap turn around, the terminal is directly infront of you.
-TERMINAL 3-
After being in the room with the sleeping Grunts you will come to an area with a ramp leading down to your left and an unlocked door in front of you. Go down the ramp and underneath the ramp is a door leading into a small room, the terminal is in there.
The Covenant
-TERMINAL 4-
In the first tower when you are on the elevator about to go upstairs look to your right and their is an area, jump across to this area and the terminal is here.
-TERMINAL 5-
When you get into the Hornet fly straight over to the building on the cliff to your right, the one that the Elites were at. Get out of the Hornet and go inside, the terminal is in there.
This is the same building that the Thunderstorm skull is on.
-TERMINAL 6-
In the last tower, the one that Johnston failed to de-activate stand on the elevator, just like you did for terminal 4 and there should be a small area to your Left that you jump accross to. The terminal is there.
Halo
-TERMINAL 7-
Once you exit the ice cave at the start if you stick to the right and go along the cliff there is a small hole in the ice, Cortana will say, “Where are you going?”
Go inside and there is a Terminal, Cortana will say, “Wait, what’s that?”
and, “How many of these have you found?”
Congratulations, that’s all the terminals and the Marathon Man achievement.
 Tips:When playing online try to keep a stock of Plasma or Spike grenades handy, you can even the fight if you are about to die by taking your opponent with you, if you are running out of shield and you are close to them throw the grenade on them, you will die, but they will die too.
When playing either online or offline you can combine melee and shooting to strengthen yourself. In campaign Brutes can be taken out by shooting them then punching them by pressing B. In online play players can be killed the same way, also melee comes in handy if you are reloading.
When versing the Flood melee works well, but melee does not work so well against the wall shooters, so try not to carry melee only weapons, I find carrying a Needler does really well, but nothing beats it more than dual Plasma Rifles. Dual Plasma rifles slaughter the flood, and they aren’t melee.I finished Cortana a lot easier with them.
You can survive a lot longer by jumping around, online and in campaign, If you’re running out of shield jump around and get to cover, or if your good enough with your controls and looking you can jump all the time and shoot while jumping around.
Press start and go Settings-Game-Controls-Look Sensitivity
Changing it to 10 (INSANE) makes it quicker when you look around, this can take some time to get use to but makes you a lot more powerful and more quicker online and in campaign.
 Incase anyone was wondering this symbol (to the left) appears next to some peoples names when playing online. This just means that the player has logged into the Bungie website with their Hotmail account.
You to can log into the website using your Hotmail account that you used to make your Xbox live account. Try it, there;s pretty cool stuff there.
TRICKS
I’ve found great use of the marines and elites on campaign, you can swap weapons with them right? Well!
I go around and collect stronger weapons and give them to my allies.
For example on The Covenant instead of using the Spartan Laser that you are given at the start of the level I gave it to an ODST troop, firstly he probably has better aim with that thing than I do, and secondly in his hands it will never run out of ammo.
Normally the Spartan Laser only has 5 shots, using 20 charges per shot. But with an ally holding it it lasts forever. I drove around in a Warthog with the ODST Spartan Laser troop in the passenger seat and he took out the Wraiths, Prowlers. Then when I went in the Hornet he took out a few Banshees and an Anti-Air Wraith.
Then I gave Brute shots to all the elites and gave a Fuel Rod to one of them, but enough about that.
Here’s something to remember though, Marines and ODST will not take alien weapons except for Plasma Pistols, Needlers and I think Carbines and Plasma Rifles.
Elites take practically any weapon you want to give to them.
 There are 3 ‘cheats’ to Halo 3, I call them ‘Cheats’ because they aren’t really cheats at all, they are things the developers would have used during the game when testing it and stuff.
The first one hides your weapon from your view, everyone else can see it, but you cant.
To do this press and hold down LB, RB, LS, A and Down (D-Pad)
The next one shows coordinates, so basically grid location on the map.
To do this press and hold down LB, RB , LS , A +and Up (D-Pad)
And this next one only works if you have coordinates on, it changes the mode of the coordinates.
To do this press and hold down LS, RS and Press Left (D-Pad)
Thanks for reading the post people!
Be sure to get updates and more stuff
on Halo 3 in the near future.
I’ll be sticking some of my Halo 3 maps on here for you to see soon.
Until next time,
Ben A Ball, out.