Adding a volcano to your pictures – Free, using Gimp
So basically if you haven’t got Gimp already download it here. It’s an awesome FREE photo shop program that’s capable of a lot of stuff, if you have Adobe Photoshop, then you can add volcanoes too! But this tutorial will only show you how to add a volcano using GIMP.

1. First off lets open our picture up in Gimp.
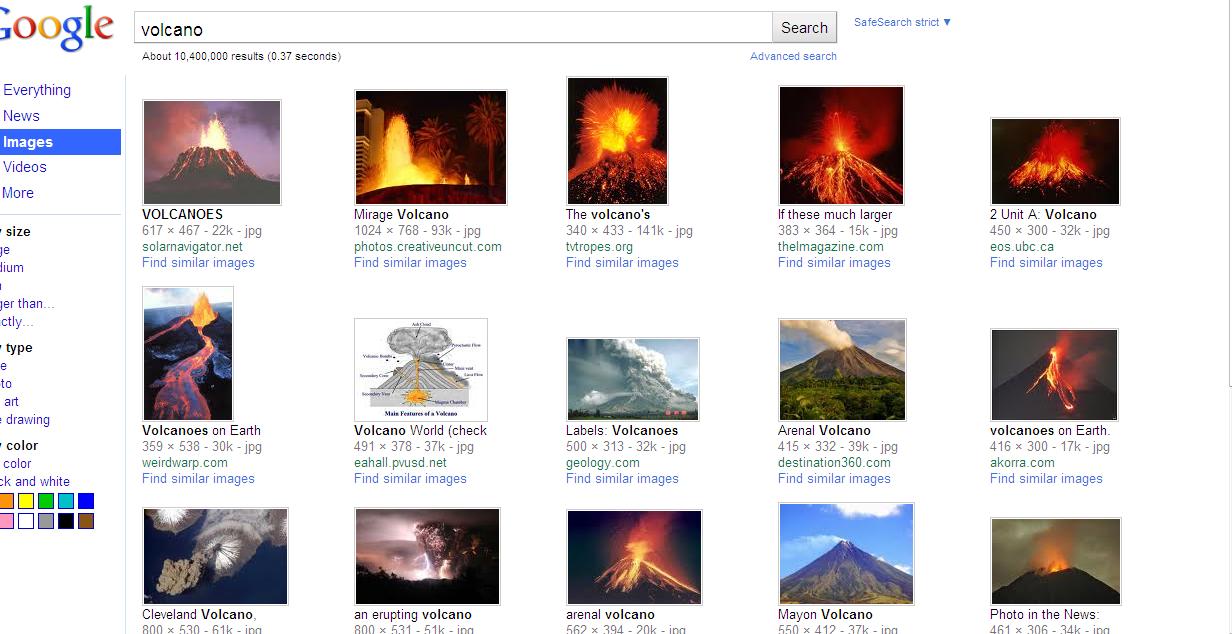
2. Open up your web browser and do an image search for ‘Volcano’ select a picture that looks clear and easy to work with and save it to your pictures folder.

I used this one!
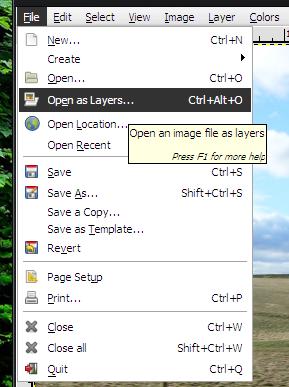
3. Go back into Gimp, click File, and Open as Layers… then find the volcano image that you saved.
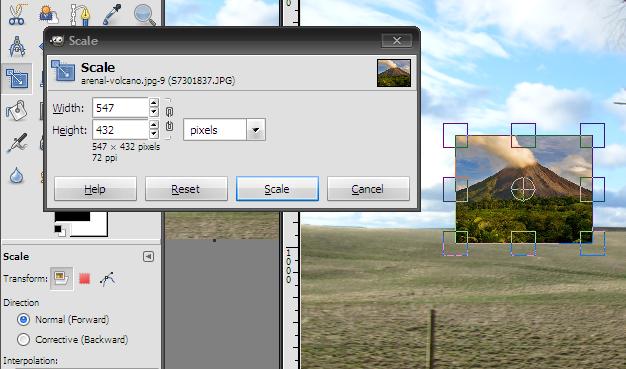
4. Now the picture is on as a layer, click the scale button in the tools and resize it to your liking, you can even move it around using the circle in the middle of the picture.
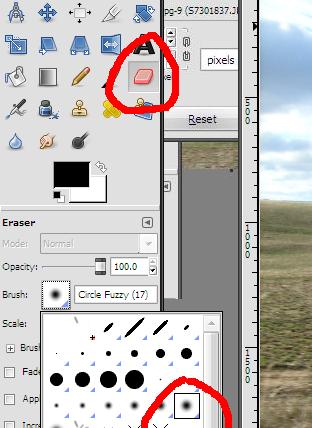
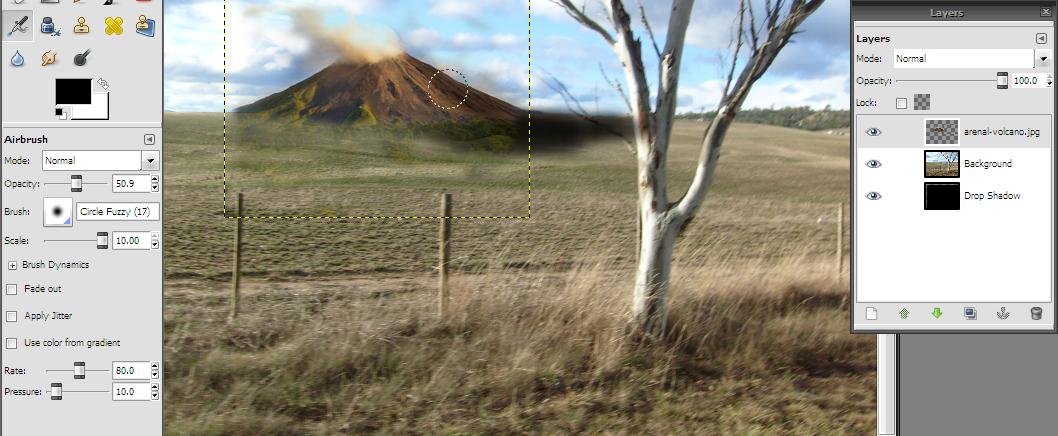
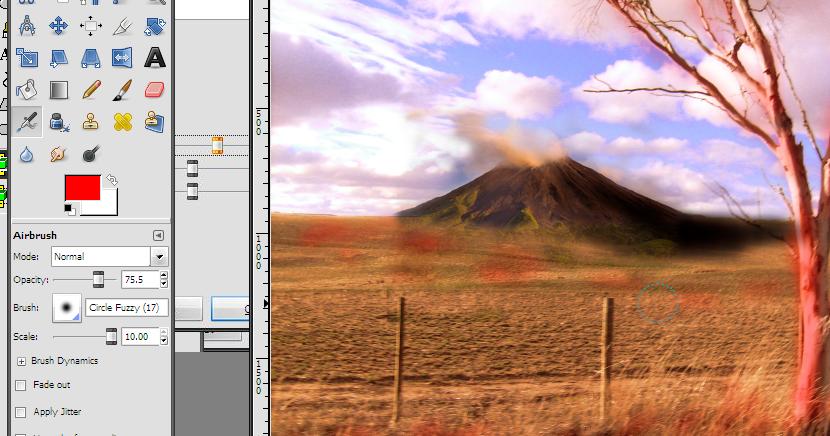
5. Now you’ve positioned and resized, select the eraser from the tool sidebar, and down the bottom set the Scale to 10 by sliding the bar and set the Brush to Circle Fuzzy (17)
Go through erasing the sky and the ground of the volcano picture, remember to change the Opacity in the tool sidebar now and then to add extra effect.
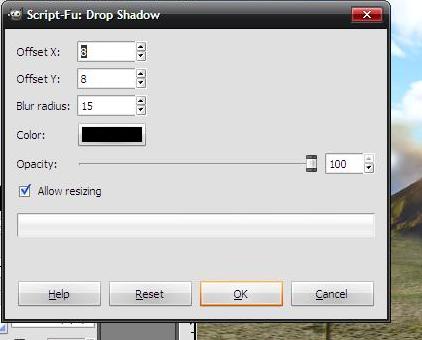
6. On the context menu, (bar along the top of the window) click Filter then Light and Shadow… and lastly Drop Shadow
A window will come up, just click OK.
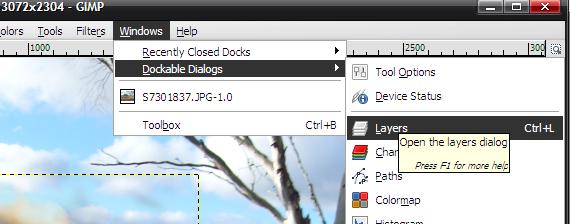
7. On the top bar click Windows then Dockable Dialogs and then Layers, the layer window will pop up showing you the layers. (The layer window may already be open, so you may not have to do this step)
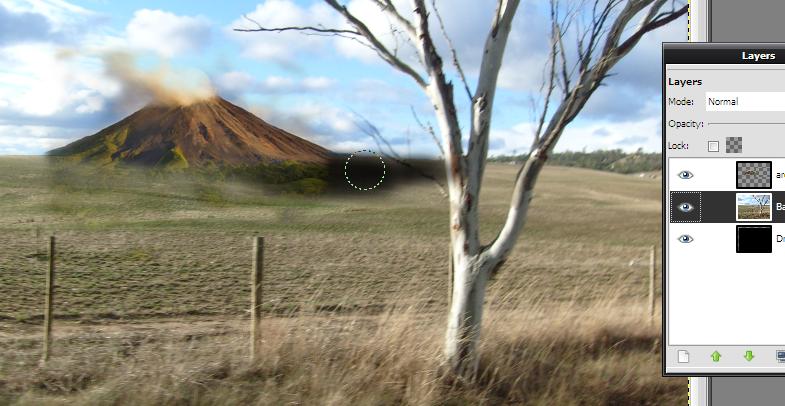
8. Select the Background from the Layers Window, then select the eraser from the tool sidebar, select Scale 10, and then use the eraser to make a black shadow behind the volcano. Where this shadow goes depends on where the sunlight is coming from in your picture.
9. Click on the volcano picture in the Layer Window.
Now select the AirBrush tool from the tool sidebar, select Scale 10, Brush Circle Fuzzy (17) and the Opacity about halfway, about 57%.
Now use the airbrush tool to add the shadow onto the volcano picture.
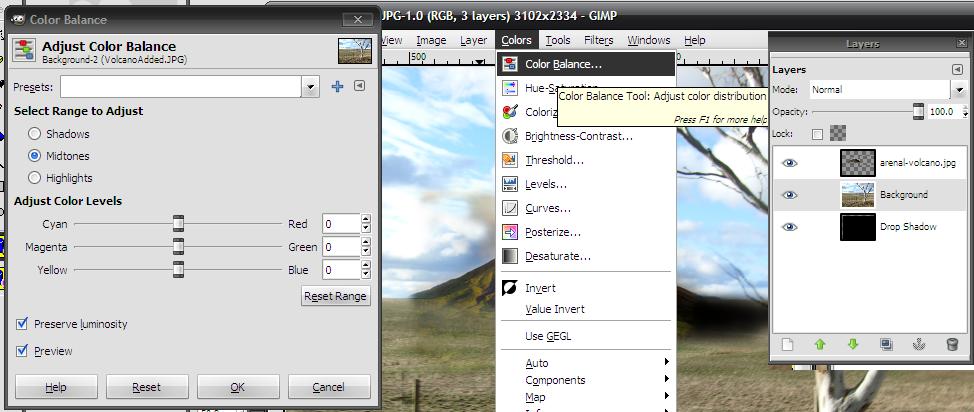
10. Select the Background from the Layers Window, then click Colors and Color Balance… from the top menu.
The “Color Balance” menu will appear.
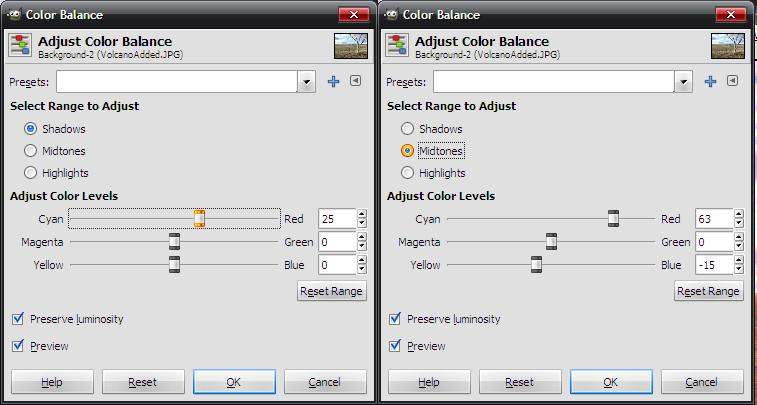
11. In the Colour Balance window change the colour level as the picture to the right shows, or you give your picture some individuality and change the colour levels to your own liking.
Then click OK
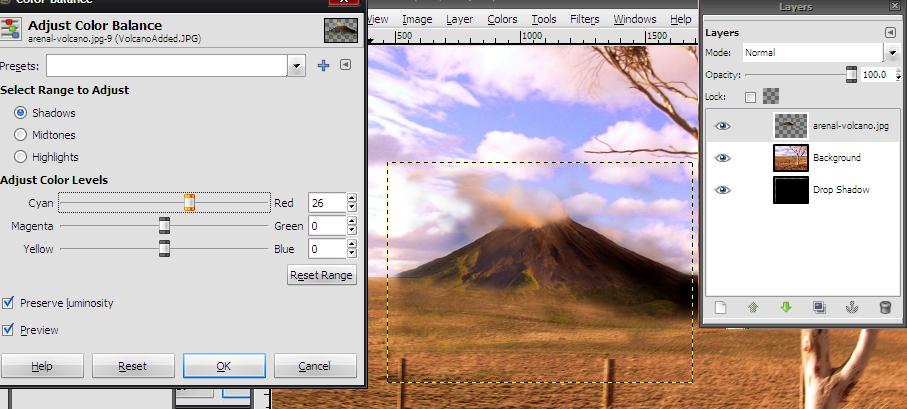
12. Now select the Volcano picture from the layers window and change the Colour Level of Red to 26, or if you picked your colour levels, make the volcano image 1 level higher on your colour than your custom scheme.
13. Looking good?
Now select the AirBrush tool, change the colour to red, (Or a colour of your choice) with an opacity of about 75%
Then use the airbrush tool to go over the tree, the grass, basically colour anything you want to give it a glowing red effect.
14. Last but not least change the airbrush colour to white and go over the tree a bit, it makes the tree whiter, but still obtains a reddish glow.
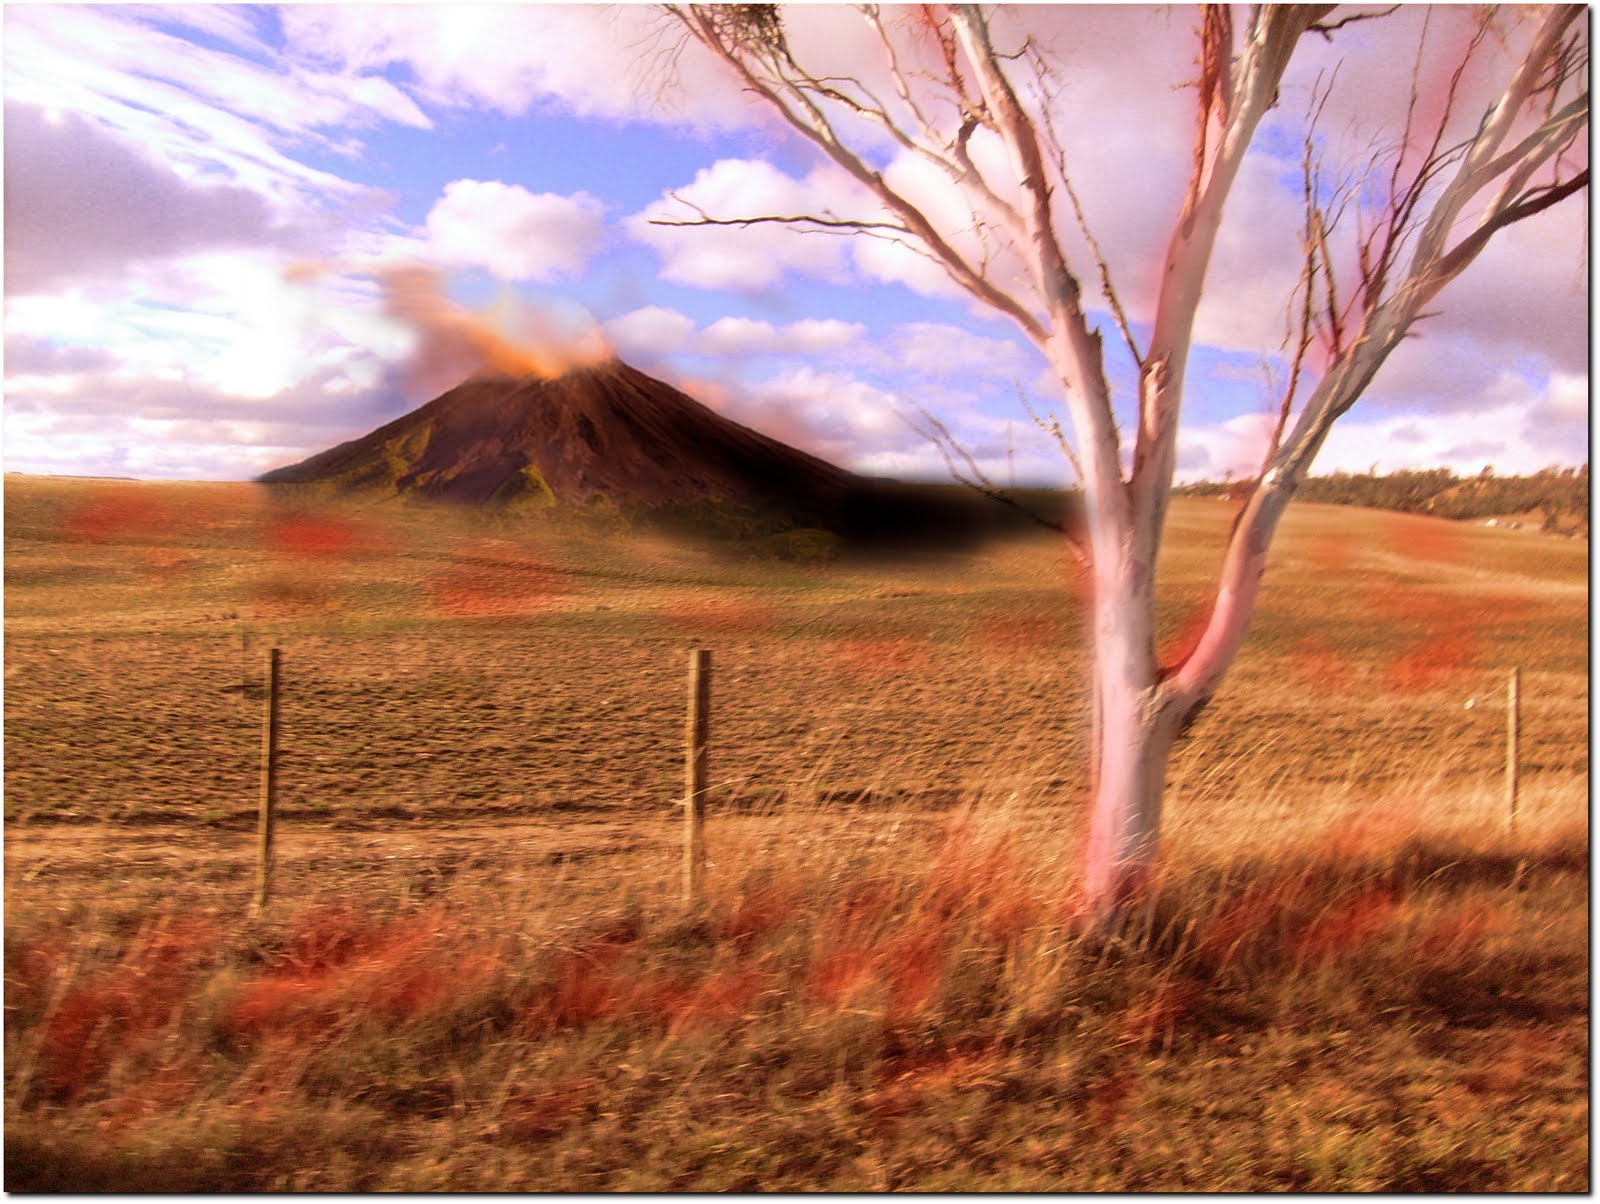
Then just touch up a bit with the eraser and the airbrush if you need to, then you have the end result:
What-ch-ya think? Don’t forget to leave a comment, not a spam one, don’t like them.
Did this work out for you? If it didn’t feel free to contact me,
If it did then why don’t you send it to me so that I can have a look!
Until next time!
Cya later guys!